

If you want smooth, professional-looking surfaces fast, learning how to use a power sander effectively is a game-changer. Whether you’re sanding wood, metal, or paint, the right technique can save you time and effort while giving you perfect results.
You’ll discover simple tips and tricks that make your sanding work easier and more precise. Keep reading to unlock the secrets that will turn you into a confident, skilled user of your power sander. Your next project deserves nothing less.

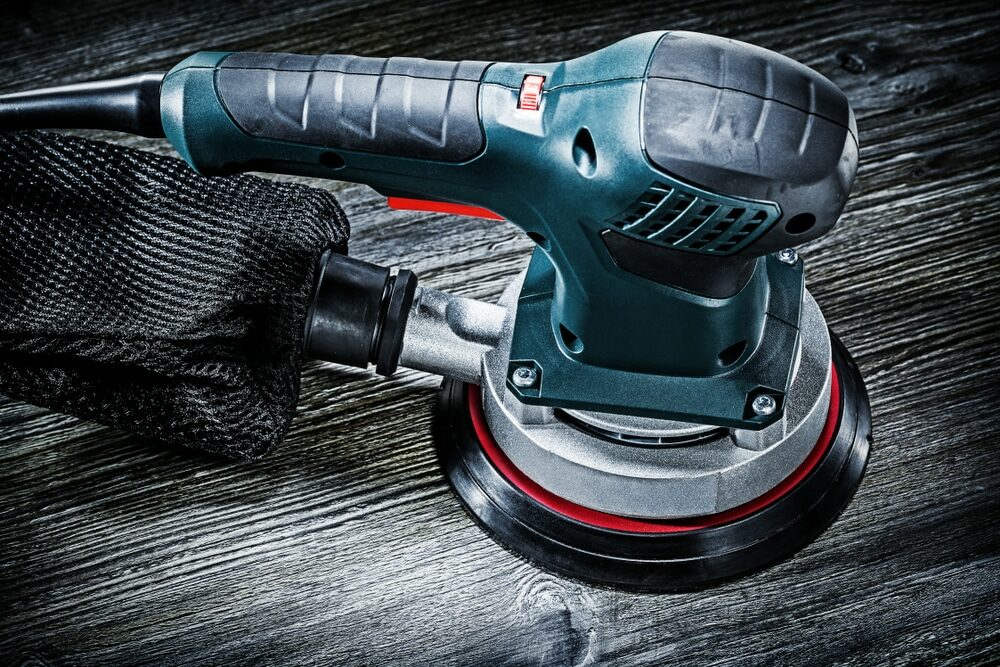
Credit: dengarden.com
Choosing The Right Power Sander
Using a power sander makes woodwork faster and smoother. Picking the right sander helps you work well.
Different sanders fit different jobs. Learn about types and how to match them to your project.
Types Of Sanders
There are many sanders. Each type works best on certain surfaces and tasks.
- Orbital Sander:Moves in small circles. Good for light sanding and finishing.
- Belt Sander:Uses a continuous belt. Best for heavy sanding and removing lots of material.
- Detail Sander:Has a small, pointed pad. Ideal for corners and tight spots.
- Random Orbital Sander:Spins and orbits. Gives a smooth, swirl-free finish.
- Disc Sander:Uses a spinning disc. Works well on flat surfaces.
Matching Sander To Project
Choose your sander based on the project size and material. This helps you get good results.
Use light sanders for small or delicate jobs. Use heavy-duty sanders for large or rough surfaces.
| Project Type | Best Sander | Reason |
|---|---|---|
| Fine Wood Finishing | Random Orbital Sander | Smooth finish without marks |
| Removing Paint or Stain | Belt Sander | Powerful and fast material removal |
| Small Corners and Details | Detail Sander | Fits tight and hard-to-reach spots |
| Flat Surfaces | Disc Sander | Even sanding on large, flat areas |
| Light Sanding | Orbital Sander | Good for quick, light sanding tasks |
Preparing Your Workspace
Before using a power sander, get your workspace ready. A clean and safe area helps you work well.
Organize your tools and clear the space to avoid accidents. Good preparation saves time and effort.
Clearing And Securing The Area
Remove all items that can block your movement or get damaged. Clear away dust and debris for better sanding results.
Keep pets and children away from the workspace. Make sure the area has enough light to see your work clearly.
- Move furniture and objects out of the way
- Sweep or vacuum the floor to remove dust
- Cover nearby items to protect from dust
- Ensure good lighting in the workspace
- Keep the area dry and free of liquids
Safety Precautions
Wear protective gear before starting. Safety glasses protect your eyes from dust and debris.
Use a dust mask to avoid breathing in particles. Hearing protection helps reduce noise from the sander.
- Wear safety goggles or glasses
- Use a dust mask or respirator
- Wear hearing protection like earplugs
- Use gloves to protect your hands
- Wear tight-fitting clothes to avoid getting caught
Setting Up The Sander
Setting up your power sander correctly helps you work safely and get good results. Follow simple steps to prepare the sander before you start.
Make sure the sander is clean and unplugged before attaching any parts. This keeps you safe and protects the tool.
Selecting Sandpaper Grit
Choose the right sandpaper grit for your project. Grit is the number that shows how rough or fine the sandpaper is.
Use coarse grit for quick material removal. Use fine grit for smooth finishing.
- Coarse grit (40-60) removes paint and rough wood fast
- Medium grit (80-120) smooths surfaces
- Fine grit (150-220) prepares wood for finishing
Attaching Sanding Pads
Attach sanding pads securely to the sander. This keeps the sandpaper from slipping during use.
Match the sanding pad to the sander type. Press or screw it on tightly. Check that it is flat and stable.
- Use hook-and-loop pads for easy paper changes
- Clamp pads firmly for belt sanders
- Replace worn pads to keep sanding smooth
Credit: mrsander.co.uk
Techniques For Smooth Sanding
Using a power sander correctly makes your work easier. Smooth sanding removes rough spots and prepares surfaces well.
Good techniques help you avoid scratches and uneven surfaces. Focus on hand position, pressure, and sanding patterns.
Proper Hand Positioning
Hold the power sander firmly with both hands. One hand should guide the sander while the other supports it.
Keep your wrists straight to reduce fatigue. This also helps control the sander better for smooth results.
- Place one hand on the front handle or pad
- Use the other hand on the rear handle or body
- Keep fingers clear from moving parts
- Keep your grip steady but not too tight
Maintaining Even Pressure
Apply light to medium pressure on the sander. Pressing too hard can cause uneven sanding or damage.
Let the sander do the work. Push down only enough to keep good contact with the surface.
- Keep pressure steady across the surface
- Do not press too hard or the sander will skip
- Adjust pressure if the sander vibrates too much
- Check the surface often to avoid over-sanding
Sanding Patterns To Follow
Sanding in a consistent pattern helps create a smooth finish. Move the sander evenly over the entire area.
Overlap your passes slightly to avoid missed spots. Change direction with each grit for best results.
- Start with long, straight strokes
- Overlap each stroke by about 50%
- Sanding across the grain first, then with the grain
- Use circular or random orbits for fine finishing
- Check surface smoothness frequently
Avoiding Common Mistakes
Using a power sander saves time and effort. Many people make mistakes that damage surfaces or create extra work.
Knowing how to avoid these errors helps you get smooth, clean results every time.
Preventing Surface Damage
Pressing too hard with a power sander can leave deep marks. Let the sander do the work with light pressure.
Use the right grit sandpaper for your project. Start with coarse grit for rough surfaces. Switch to fine grit to finish smoothly.
- Do not keep the sander in one spot for long
- Move the sander evenly across the surface
- Check your progress often to avoid over-sanding
- Replace worn-out sandpaper to keep sanding effective
Handling Dust And Debris
Power sanders create a lot of dust that can harm your lungs and make a mess. Always wear a dust mask or respirator.
Use a sander with a dust collection bag or connect it to a vacuum to reduce dust. Clean the work area often to avoid buildup.
- Wear safety glasses to protect your eyes
- Work in a well-ventilated area
- Empty the dust bag regularly
- Dispose of dust safely to prevent fire hazards

Credit: www.youtube.com
Finishing Touches
Using a power sander well can make your project look smooth and neat. Finishing touches help remove rough spots and prepare the surface for paint or stain.
Focus on small details to avoid uneven areas. Proper sanding gives your work a professional look.
Inspecting The Surface
Check the surface carefully after sanding. Look for scratches, bumps, or rough patches that need more work.
Run your hand over the wood to feel for smoothness. Use good lighting to spot uneven areas.
When To Switch Grits
Start sanding with coarse grit to remove big marks. Change to finer grit for a smoother finish.
Switch grit when the surface feels even and rough spots are gone. Using the right grit prevents scratches.
- Coarse grit (60-80) for heavy sanding
- Medium grit (100-150) for smoothing
- Fine grit (180-220) for final finish
Cleaning The Sander
Keep your sander clean to work well and last longer. Remove dust from the sanding pad after use.
Check the dust bag or vacuum attachment and empty it often. Clean vents to stop the motor from overheating.
Frequently Asked Questions
What Safety Gear Is Essential When Using A Power Sander?
Always wear safety goggles, a dust mask, and ear protection. Gloves and long sleeves help protect your hands and arms from debris and vibration. Proper safety gear prevents injuries and ensures a comfortable sanding experience.
How Do I Choose The Right Sandpaper Grit?
Start with coarse grit (40-60) for rough surfaces, then progress to medium (80-120). Finish with fine grit (180-220) for smoothness. Choosing the right grit ensures efficient sanding and a flawless finish.
Can I Use A Power Sander On All Wood Types?
Yes, power sanders work on most wood types, including softwoods and hardwoods. Adjust grit and sanding pressure to avoid damage. Using the correct technique preserves wood quality and appearance.
How To Prevent Swirl Marks When Sanding?
Use fine grit sandpaper and avoid excessive pressure. Keep the sander moving steadily and overlap sanding paths. Proper technique prevents swirl marks and results in a smooth surface.
Conclusion
Using a power sander effectively requires practice and care. Always ensure you wear safety gear. Follow each step with attention to detail. Maintain a steady hand for smooth surfaces. Regularly check your equipment for any issues. Choose the right sandpaper for the material.
Keep your workspace clean to avoid accidents. Take breaks to prevent fatigue and mistakes. With these tips, you’ll achieve great results. Sanding can transform your projects. Enjoy the process and see your skills grow. Happy sanding!
8 min read